Making sense of wireless window sensors
Designed in response to the growing popularity for smart home security, ERA’s new app-controlled window sensor, WindowSense, supports security professionals in providing homeowners with complete protection and convenience.
Engineered with installers in mind, the battery‐operated sensor and magnetic contact are quickly and easily fitted to the internal frame of the window, eliminating the requirement for time‐consuming and costly wiring.
Available in white, black or tan, WindowSense fits discreetly within the eurogroove of a wide range of PVCu profiles and is ideal for any size or style of home. Part of the growing ERA Protect ecosystem of app‐controlled security products, the wireless integrated sensor alerts homeowners to any attempts made by intruders to gain entry to their property via the windows.
In the event of the window being opened, the link between the two elements is broken, prompting the high quality sensor to transmit a signal to the ERA Protect Alarm hub, which sends an instant notification to the homeowner via the ERA Protect app. When fitting WindowSense, installers have the opportunity to cross‐sell the complete ERA Protect alarm ecosystem of app‐controlled and smart speaker compatible security products.
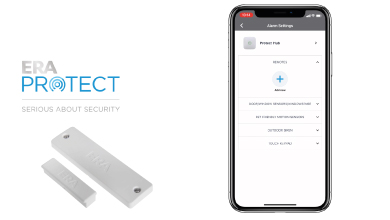
You can integrate 96 accessories to the alarm hub, including a door/window sensor, a pet friendly motion sensor and remote control. To complete your customers’ security needs, you can also add a video doorbell, indoor, outdoor and floodlight cameras.
Here we show how you can install the easy to fit system in five simple steps:
Step one
Before installing the product, you must make sure the sensor and magnetic contact are positioned in the correct direction with the arrow indicators facing each other.
The sensor must be fitted onto the window frame and the smaller magnetic contact onto the moving window sash.
The smaller magnetic contact should be centrally located above the sensor when the window is shut.


Step Two
Once you have positioned the system, use a pencil to outline a 12mm section onto the window frame.
Once you’ve marked out the section, carefully chisel out the ribbing.


Step Three
Remove the screws using a flat edge screwdriver to open the WindowSense sensor.
Place a packer against the frame on the outside portion of the window, then place the sensor plate against it.
Mark the two screw holes using a pencil.


Step Four
Using an appropriate drill bit, drill your pilot holes into the frame. Then use the screws provided to attach the bottom part of the sensor to the frame.
Insert the two supplied CR2032 batteries into the sensor and reattach the top plate.


Step Five
Remove the bottom plate from the magnetic contact using a crossheaded screwdriver.
Mark the screw holes onto the window sash. You must align the centre of the magnet body with the sensor on the frame to ensure a correct fit.
You can then drill your pilot holes.
Finally, use the supplied screws to attach the magnet body to the window sash, then reattach the bottom plate to the magnetic contact.
The WindowSense sensor is now installed.


Connect to the ERA Protect app
Once installed and connected to the ERA Protect hub, the app will notify the user each time the device is triggered, whilst the LED indicator will flash once each time the window is opened.
Homeowners can add the WindowSense system to the ERA Protect hub by accessing the alarm dashboard in the app.
The first security system of its kind to achieve the BSI IoT Kitemark for secure connected devices, ERA Protect uses bank‐level data encryption, whilst the built-in SIM card offers dual path connectivity ensuring a property remains protected, even when the internet is not available.