
How to fit a letterplate

Installing a letterplate is a simple way to enhance both the functionality and appearance of your door. Whether you are replacing an existing unit or fitting a new letterplate, following the correct process will ensure a secure, long-lasting installation.
This guide provides clear, step-by-step instructions, alongside key technical specifications for trade professionals and confident DIYers.
Please note this guide covers the ERA Decorative letterplate only.
It’s always advisable to refer to the individual manufacturer's instructions for the specific product details.
Before You Begin
Before fitting your letterplate, it is important to confirm:
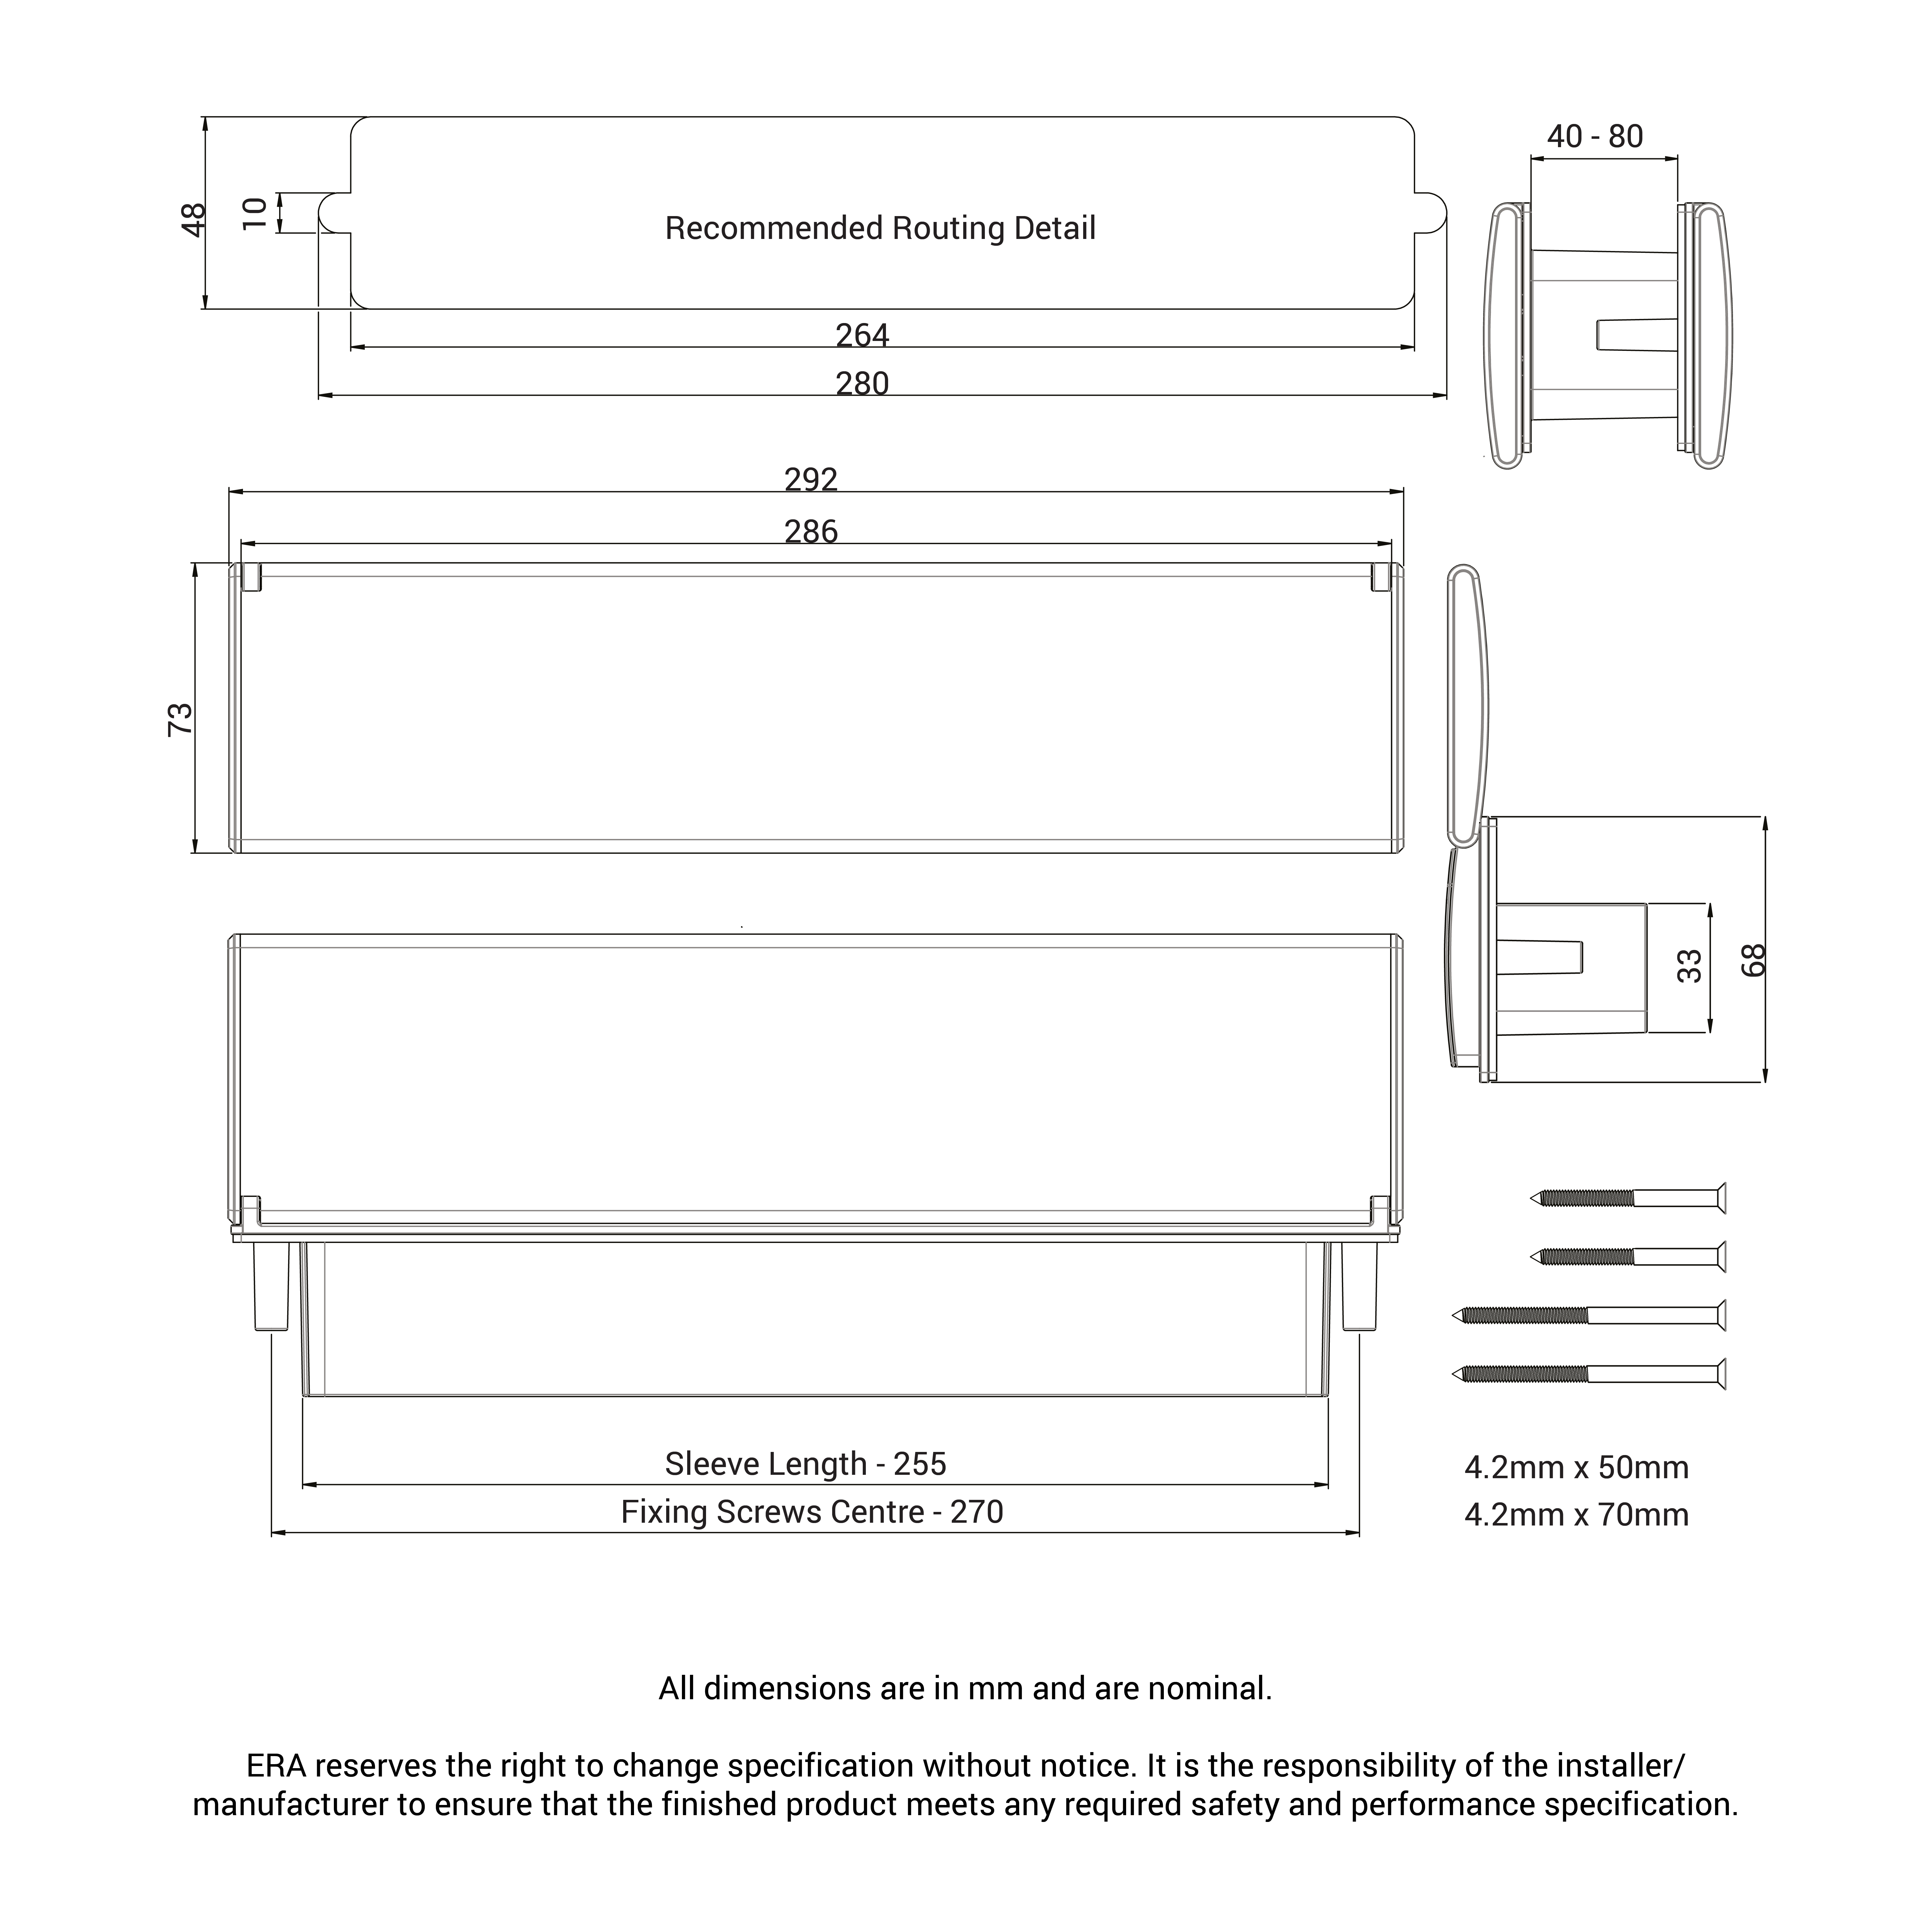
- The door thickness is between 40mm and 80mm
- The letterplate is being installed on the midrail of the door
- Existing cut-out (if applicable) matches required routing dimensions
- The correct fixing bolt length is selected for your door type
If replacing an existing letterplate, minor adjustments to the aperture may be required to ensure a precise fit.
Tools Required
You will need:
- Pencil
- Tape measure
- Drill
- Screwdriver
- Hacksaw (for adjusting bolt length if required)
Step-by-Step Installation Guide
1. Measure the Door Thickness
Measure your door to determine the appropriate fixing bolts:
- 50mm bolts – suitable for thinner doors
- 70mm bolts – suitable for thicker doors
Note: Bolt length may need to be trimmed to achieve a secure fit.
2. Mark the Position
- Mark the centre point of the letterplate on the midrail
- Use a tape measure to ensure accurate alignment
Correct positioning is essential for both performance and appearance.
3. Prepare the Door Aperture
Ensure the door is routed to the correct dimensions before installation.
Key measurements:
- Fixing screw centres: 270mm
- Sleeve length: 255mm
- Overall width: approx. 291.5mm
- Aperture height: approx. 68mm
4. Identify External and Internal Plates
- The external plate includes the fixing lugs
- The internal plate secures the unit from inside
Ensure correct orientation before fitting.
5. Install the External Letterplate
Insert the external section into the aperture from outside the door, ensuring it sits flush against the surface.
6. Secure the Internal Plate
- Align the internal plate with the external section
- Insert and tighten the fixing bolts
Tighten evenly to ensure a firm and secure installation. Avoid overtightening.
7. Check Operation
- Confirm smooth opening and closing
- Ensure the letterplate is securely fitted with no movement or gaps
Technical Specifications
|
Specification |
Detail |
|
Door Thickness |
40mm – 80mm |
|
Fixing Centres |
270mm |
|
Sleeve Length |
255mm |
|
Bolt Sizes |
50mm / 70mm |
|
Fixings |
4.2mm x 50mm / 4.2mm x 70mm |
|
Door Types |
PVCu, Timber, Composite |
All dimensions are nominal and may vary slightly depending on door type.
Maintenance Guidance
To maintain the finish and performance of your letterplate:
- Clean with a soft, dry cloth
- For more thorough cleaning, use warm soapy water
- Dry thoroughly after cleaning
Regular maintenance will help preserve both appearance and durability.
Need Support?
If you need further help, our Expert Team at ERA will be happy to speak to you.
ERA offers a wide range of letterplates to match the design and style of your front door. Including our decorative range.
With 240 hour corrosion resistance, and a 10 year mechanical warranty, our letterplates are a perfect addition to any home’s exterior doors.
Find out more about ERA’s range of letterplates here.
